Particles Dissolve Text V1.0
This setup guide from www.3dnames.co will guide you through how you can create the following Particles Dissolve Text using our Blender file.
We have designed this download file to be used by anyone, and you do not have to have any knowledge of using Blender as long as you follow this step by step guide.
We have made this guide interactive, with checkboxes to tick off at each step, so you can keep track of your progress.
Happy Animating!
Video Previews
Create these animations with any text you like using our Blender file and this guide!
Need help? Chat to us on our Discord Channel
Join our DiscordYou will need Blender Installed...
Please make sure you have Blender v4.0.1 installed on your computer, you can download it for free from https://www.blender.org/download/releases/4-0/ - this file was made using Blender v4.0.1
Interactive Guide - toggle the switch on each step to mark it as completed!
Steps quick overview
1. Open Blender File
Mark as completedDownload the ZIP file, extract it somewhere and open up the ParticlesDissolveV1.0.blend file in Blender, we recommend using Blender V4.0.1 or higher.
2. Launch the 3D Names Panel
Mark as completedWhen you open the file - all you need to do is press the small play icon ▷ as per the screenshot below - then in the 3D Viewport there will be a new Panel called "3D Names" - this panel contains everything we need for this files Particles effect to work.
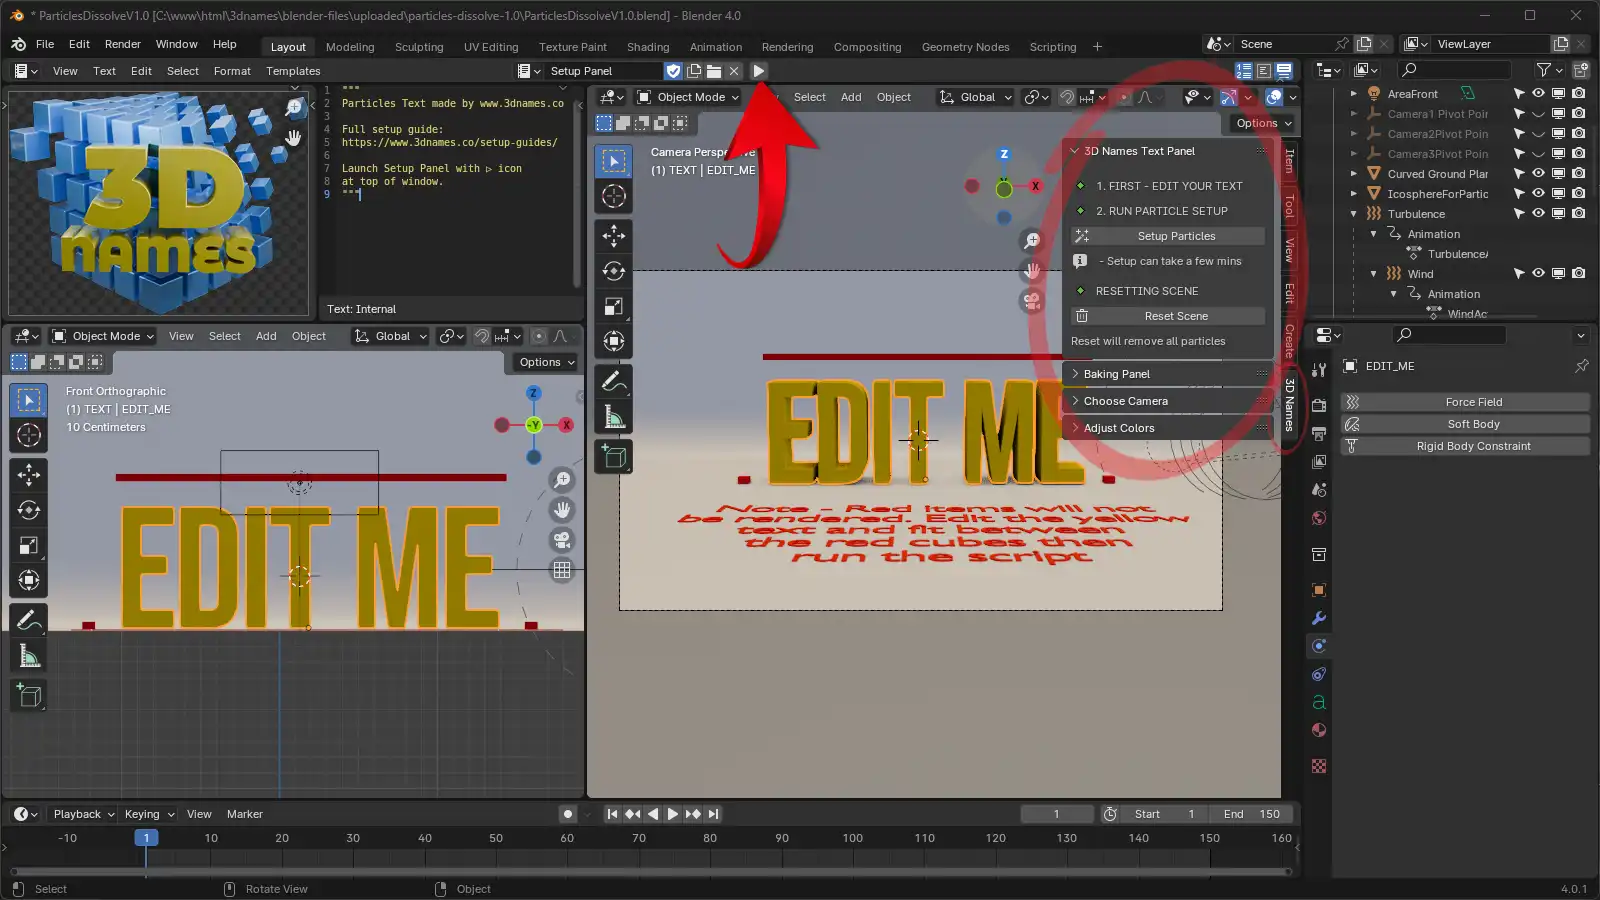
1. Press the Play icon at the top. The new panel will appear on the right hand side, to show or hide this panel you can press the "N" key on your keyboard
3. Edit Text & Re-position
Mark as completedSelect the Text object that says "Edit Me" and press the "TAB" key on your keyboard to enter edit mode. You can now edit the text to whatever you like. To exit text edit mode, press the "TAB" key once more (Hide and un-hide the right panel by pressing the "N" key on your keyboard) - to move the text around press the "G" key on your keyboard, and to scale the text press the "S" key.
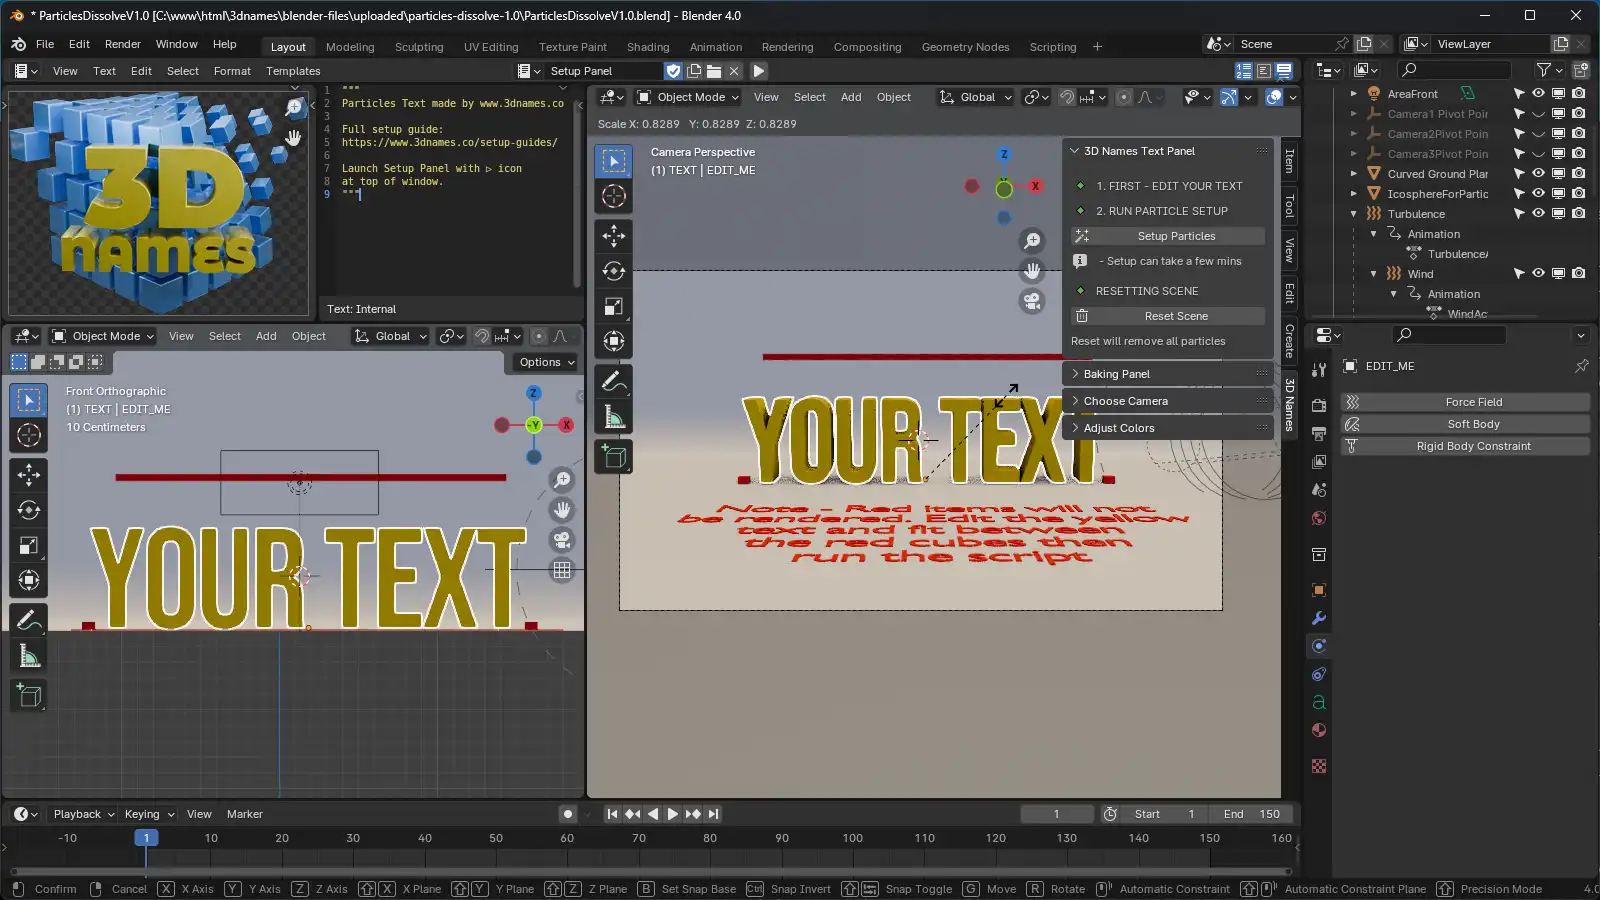
Fit the text within the red guides on the left, right, and the top
4. Press the "Setup Particles" button
Mark as completedNow press the "Setup Particles" button... it may take a minute or so to complete, but once it's finished it will have turned your text into particles & will now show you buttons for 4 particle count settings, with Low as the default. (Please don't try running the animation yet - we need to bake it first)
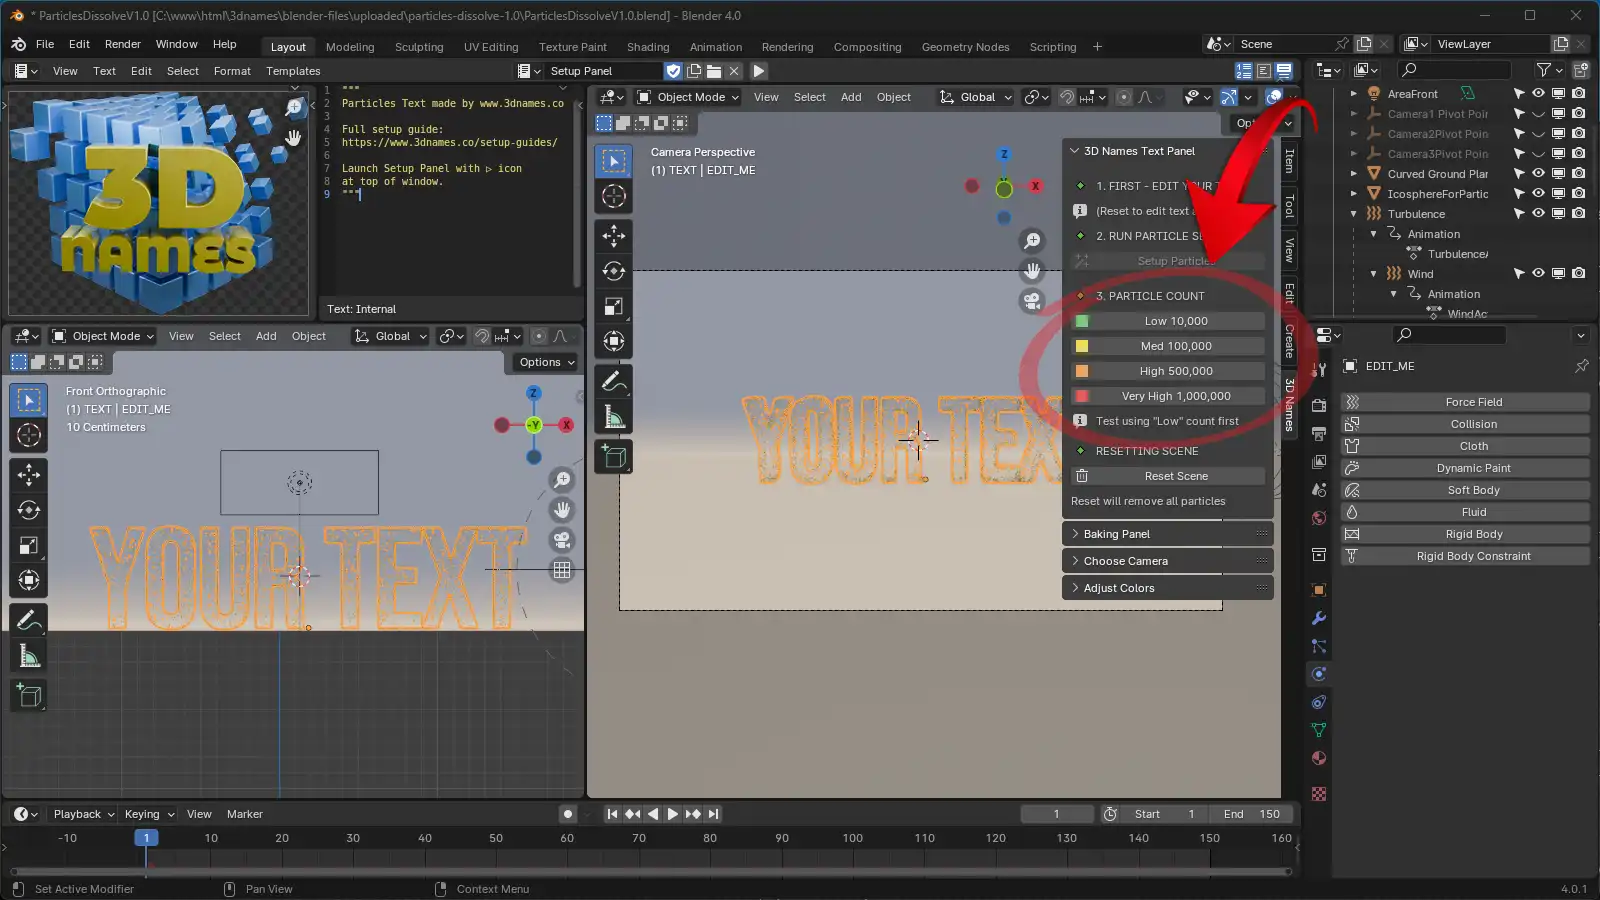
WE suggest leaving it on the Low setting for now, as higher settings will slow Blender down and take longer to bake.
5. Baking the Particles
Mark as completedOpen up the Panel called "Baking Panel" - here there are 2 options, you can either bake the particles manually by following the steps, or you can Auto Bake by pressing the "Bake Particles" button. The only downside of the auto bake process is that it's done in the background and Blender can freeze as it's happening, Windows users will see a console popup that will show the bake process. If you bake manually then you'll get to see a progress % bar at the bottom of the Blender window.
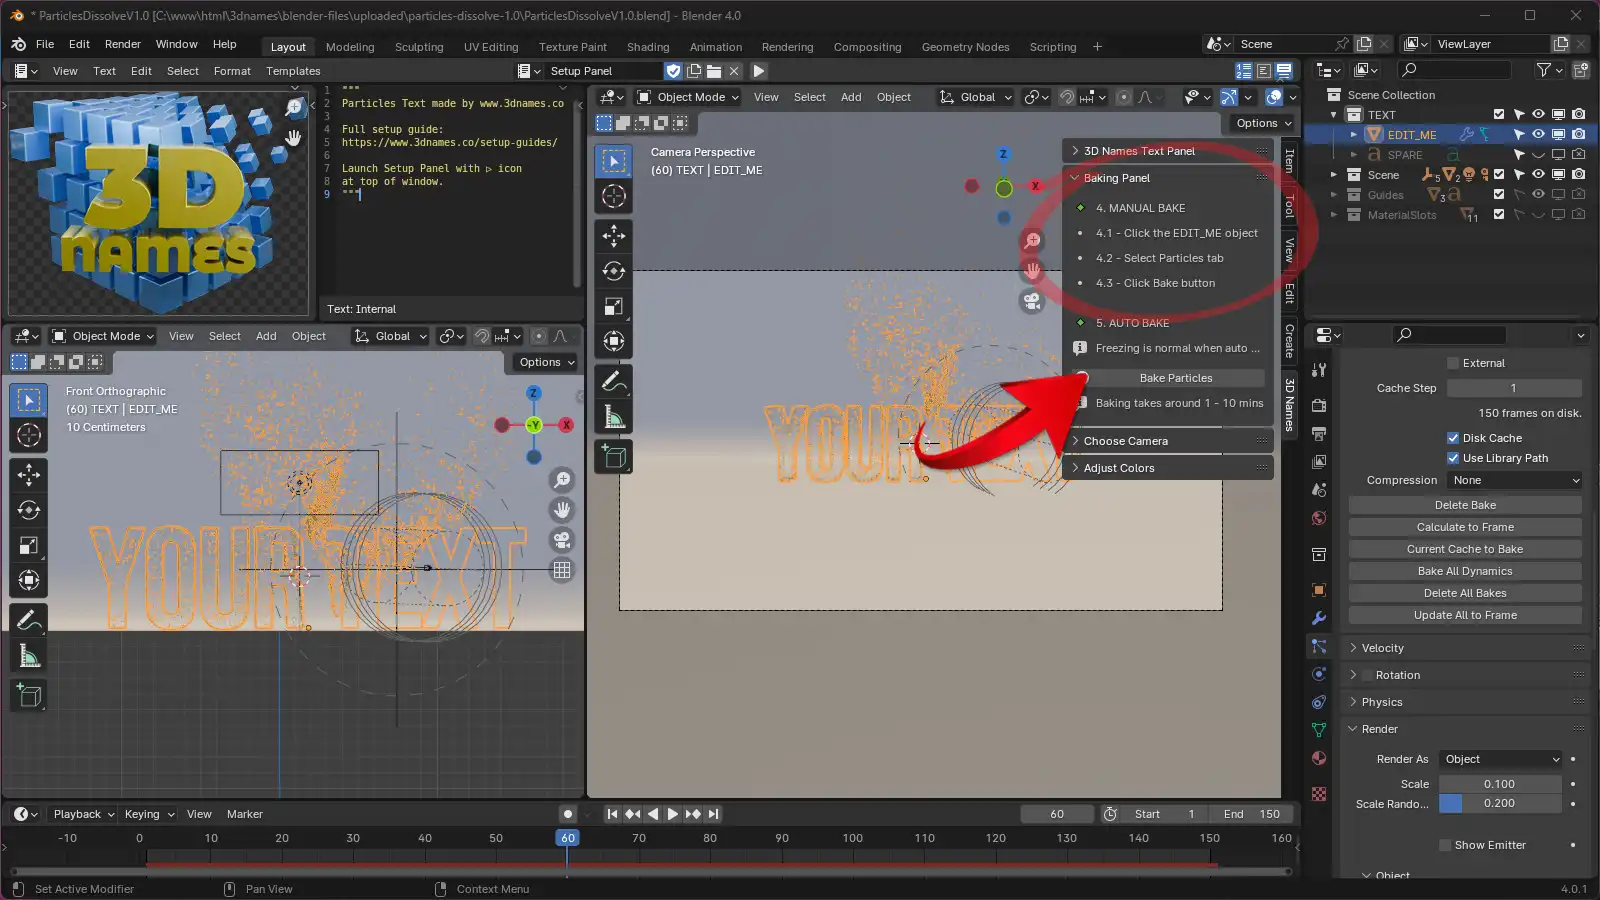
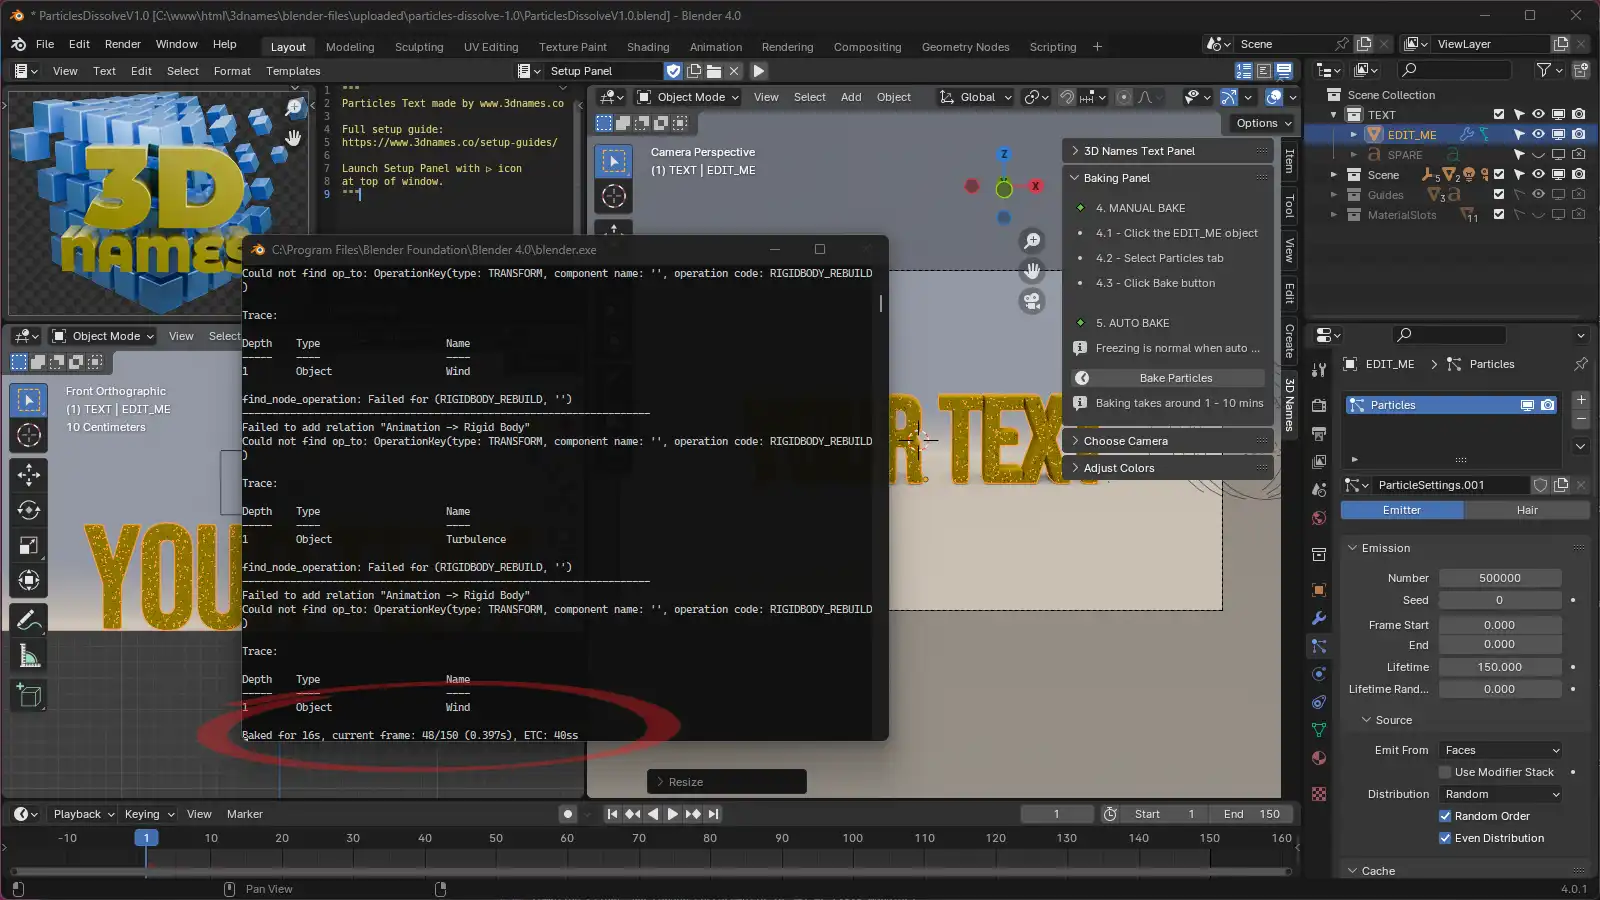
This can take anywhere between 30mins for a quick computer to a few hours for slower computers depending on the particle count you have chosen - so be patient. If using Windows a console window will show up to show you the progress when using the autobake.
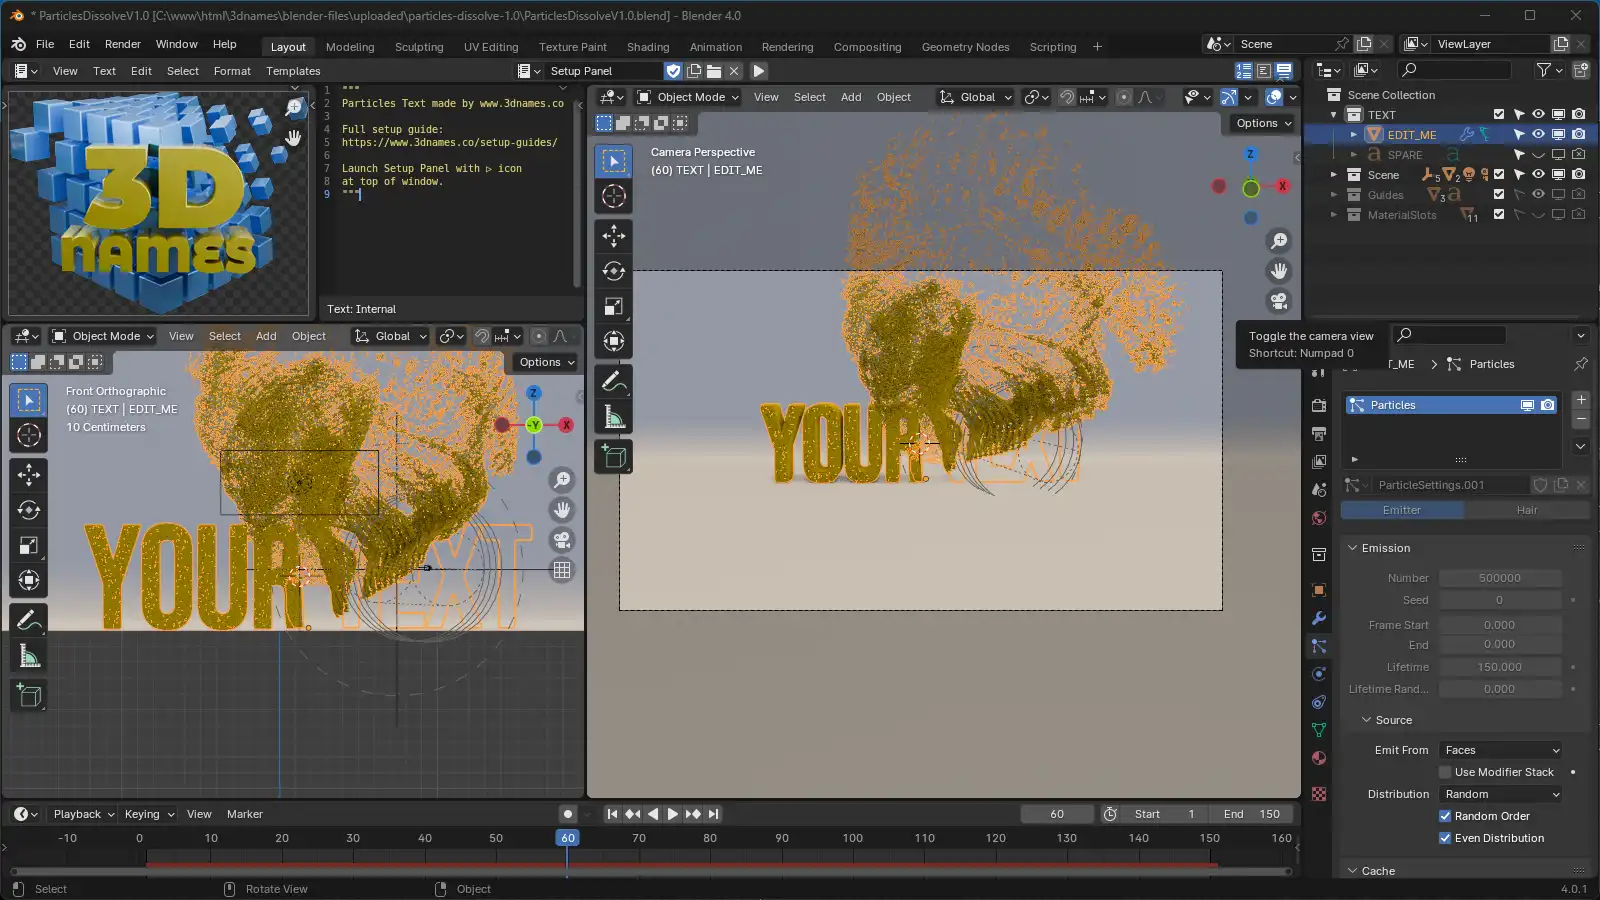
6. Scroll through the animation
Mark as completedOnce the baking of the simulation is complete you can scroll through the animation to see your particles, be aware that with a high particle count this may feel pretty slow, but should give you an idea of how it will look in the final render
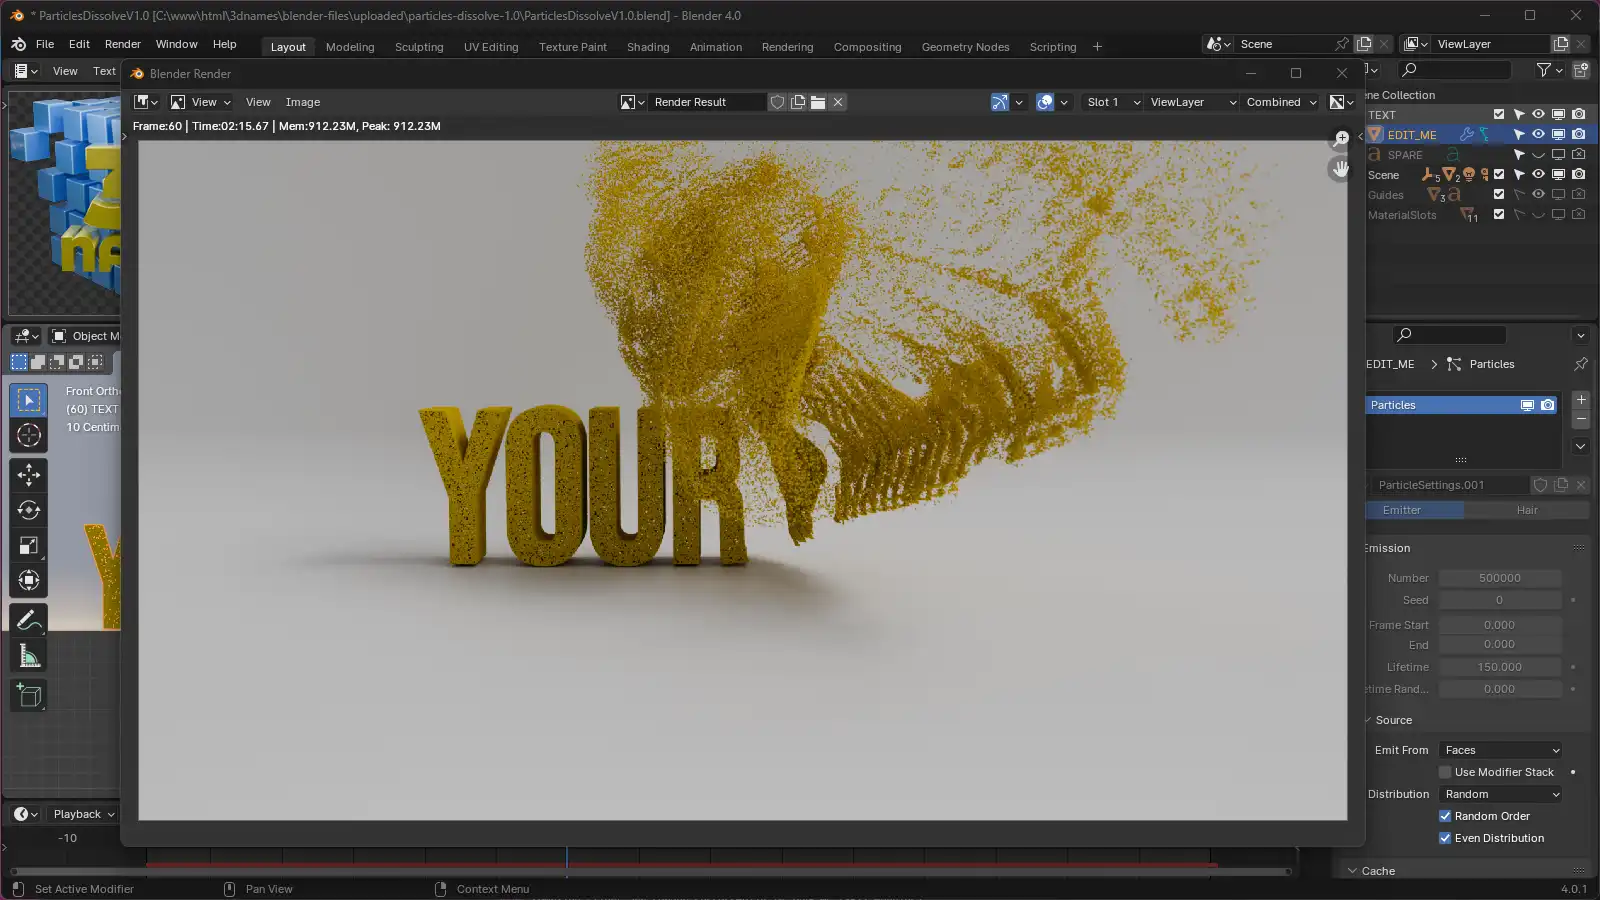
7. Now Render the animation
Mark as completedIf you'd like to render a still frame simply press the "F12" key on your keyboard, or if you'd like to render the animation, press the "Ctrl + F12" keys on your keyboard (or "CMD + F12" on Mac) - the rendered frames will be saved in the ./renders folder.
8. Optional - choosing colors
Mark as completedIf you open up the Panel called "Adjust Colors" you can change the colors of the text/particles and the background to our pre-made materials included in the blender file.

9. Optional - choose camera
Mark as completedIn the panel "Choose Camera" you can choose from 3 different camera setups we have added. Each one is animated to move around the text in a different way. You can choose the one you like the most and then render the animation, or edit them all together to give a more interesting effect.
